
Showing posts with label How To. Show all posts
How To: Restore Your 2013 Nexus 7 Back To Stock Using A Full Factory Image And Root It
The great Nexus 7 ordeal of 2013 is now over after Qualcomm apparently agreed to the release of the factory image and all necessary drivers, only a day after lots of hubbub had been made about this touchy and unpleasant situation. Awesome, so now we have access to the factory image, meaning we can restore the tablet back to stock no matter what happens to the software on it.
Say, you had a bad flash and are now boot-looping. Or your dog installed a custom ROM but Android 4.99 came out and you want to update ASAP. This is where this guide is going to come in handy. The instructions aren't any different from the usual factory image installation procedure but they apply specifically to the 2013 Nexus 7, so you can rest assured you're not following some generic guide that may not work on your device. Additionally, I've seen many variations of the steps necessary to preserve your data, and I think this is the most optimal way to go.
Note #1: If your bootloader is locked, your data will be wiped for security reasons - there's no way around that. You will want to back up what you want manually.
Note #2: If your bootloader is already unlocked, you have the option of skipping the data wipe during the factory image flashing procedure. In some situations, not wiping user data may prevent the Nexus 7 from booting, in which case you'd probably need to go ahead with the wipe, but for simple OS upgrades from one version of stock Android to another one higher, wiping data should not be necessary.
Note #3: You can root your Nexus 7 in the last step if you want.
Prerequisites
In order to complete the steps below, you need to have the Android SDK installed. The SDK contains the latest version of adb and fastboot, which you will need for flashing files and issuing commands. You will also need a MicroUSB cable to execute adb sideload, fastboot flash, and other commands. You also need to unlock your bootloader - a process that wipes your data.
Enable Developer options by going to the Settings -> About screen and tapping Build number until the OS unlocks the hidden Developer options menu. Now go to Developer options and make sure you have USB debugging turned on. For security purposes, you can turn it off after we're done.
To unlock the bootloader, if you haven't already done so:
- Reboot into the bootloader by issuing an adb reboot bootloader command on your computer orholding VolDn+Power while booting (power off, hold VolDn, then hold Power).
- Warning: This will wipe your data. Type in fastboot oem unlock on your computer. Agree to the unlock by selecting Yes on your tablet (VolUp, then Power).
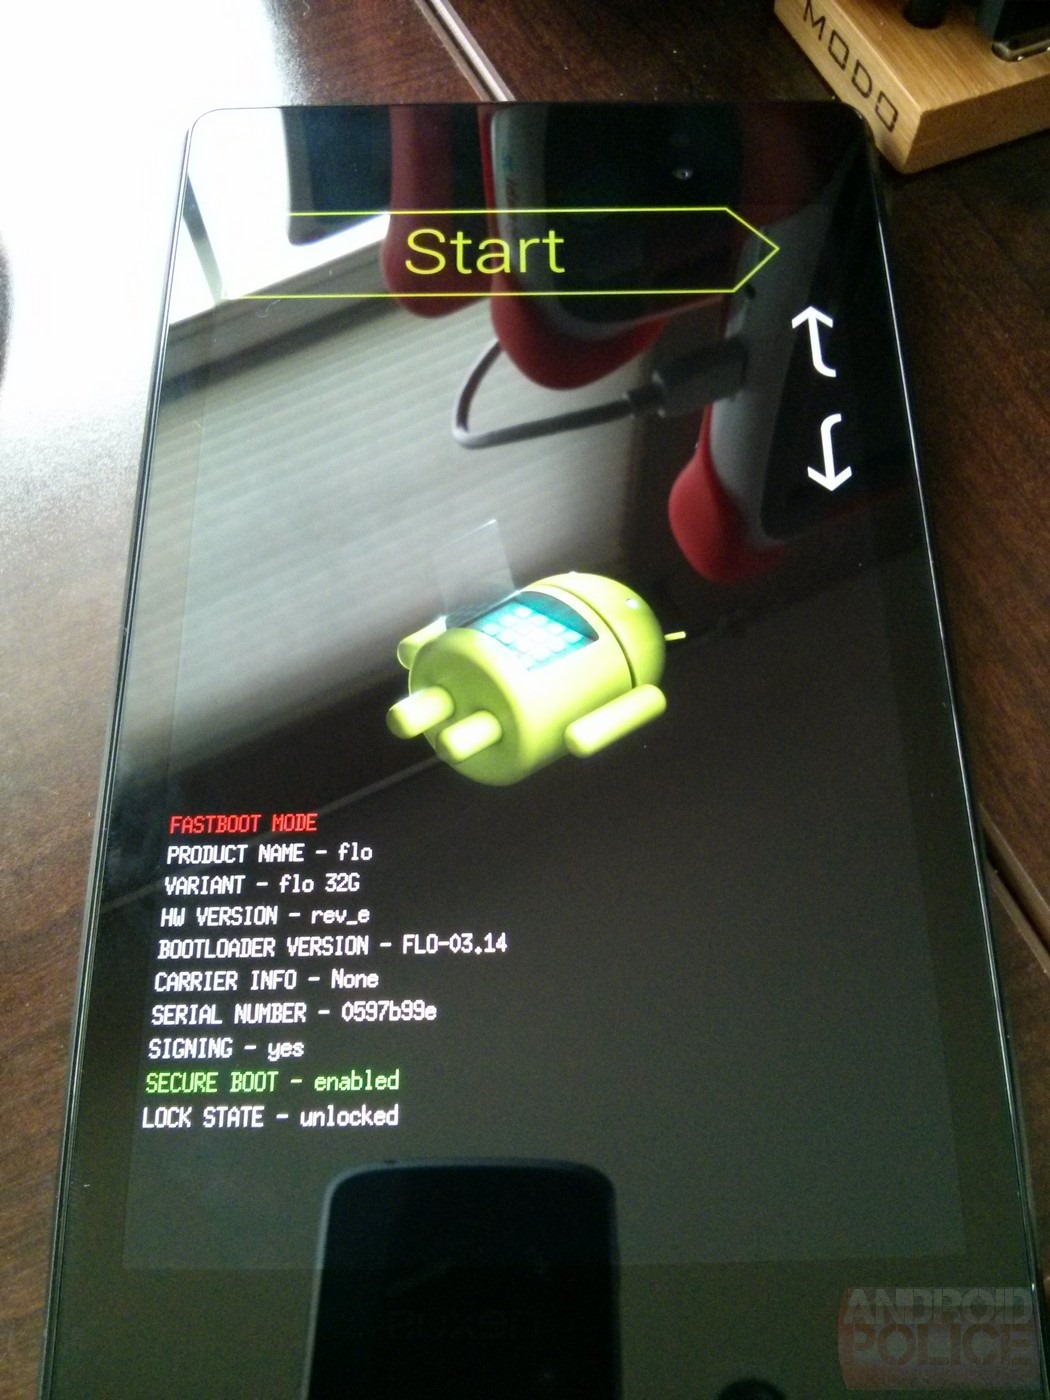
- You have now unlocked your bootloader (and the data partition was wiped clean). Verify by rebooting to the bootloader again and looking at Lock State.
The Steps
- Download the full factory image corresponding to your exact model (for example, 2013 Nexus 7 Wi-Fi is razor), which includes the full system, bootloader, recovery, kernel (boot.img), and radio (radio not included for Wi-Fi-only variants). It's a clean slate for these components - they'll flash cleanly over anything you have now.
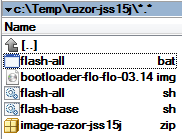
- Unpack the tgz (tar/gz) archive into its own directory. I use Total Commander, but you can use any tool that reads gz and tar, like 7-Zip:

- Proceed with this step if you want to keep your data intact. If you skip this step, your data will be wiped. With your favorite text editor, edit (be careful not to run it by accident instead of editing) flash-all.bat (if you're on Windows) or flash-all.sh (Mac, Linux) and remove "-w" from the fastboot update command. For example, if the line reads fastboot -w update image-razor-jss15j.zip, it should now read fastboot update image-razor-jss15j.zip. The -w option instructs fastboot to wipe data.
- Reboot into the bootloader and run the appropriate flash-all script:
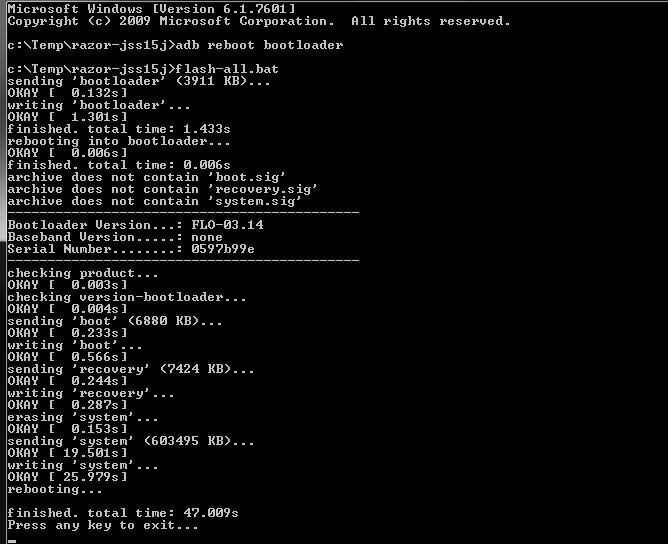
That's it, you're done. In my case, the Nexus 7 is now running stock Android 4.3:

Note: The above procedure restored the factory recovery, so if you want a custom one, you can flash one now (see below).
For better security, you can relock the bootloader by issuing fastboot oem lock while booted to the bootloader. This will, however, mean that if you ever want to do anything that requires an unlocked bootloader, you will lose your data in the unlock process.
Rooting
Rooting a Nexus 7 is very easy. It requires an unlocked bootloader and a custom recovery. I recommend using TWRP.
- Flash TWRP from here (Reboot into the bootloader as before and then fastboot flash recovery FILENAME.img).
- Reboot into recovery (adb reboot recovery or hold VolUp and Power while booting).
- Flash SuperSU from this post. To do that, download the zip, then put the recovery into adb sideload mode (in TWRP, it's under Advanced), and then do adb sideload FILENAME.zip. I've seen some people complain that doing so via CWM doesn't work, but flashing through TWRP and selecting Fix Superuser Permissions at the end does the trick.
- You should be rooted.
- Reboot, head to the Play Store, and update SuperSU.

Tag :
How To
Can I use my tablet like a phone? The answer is here.

Like any others, we are the one of the great fan of tablet but because of the illness of making calls we can’t buy tablets. The biggest difference between the phone and the tablet (other than size) is the ability to make phone calls.
For overcome this problem currently all the tablet manufactures adding the video calling apps. But from the experience this is not enough. We all know that Google have voice based service called Google Voice. But still now there is no one is using its advantage. Here is our point; we can use the Google voice advantage. For that we can borrow the help of GrooVe IP. It is an android app that that connects to Google Voice using Voice over IP (VoIP).
Using this application we can overcome the calling problem. For make it working we need
Android tablet
GrooVe IP application
Google Voice account
Bluetooth earpiece (optional)
You should know that GrooVe IP can only work with Google Voice accounts that are linked to gmail or apps.google.com. Also know that GrooVe IP uses 1.2 MB per minute for voice calling, so if you have Wi-Fi available.
Download GrooVe IP application
If you want to know more about how to make it working and about the installation procedures please follow the link. This will definitely help you.
Tag :
How To
How to Root the Sony Xperia Z?

Before rooting Xperia Z:
·
Backup your data.
·
Ensure your
battery has 50% charge.
·
Download these files:
3. Fastboot
Steps to root Sony Xperia Z:
1. Extract
files from the Fastboot archive to
your Desktop. You’ll get fastboot.exe along with some
other files.
2. Plug-in
USB cable to your PC but not to your device.
3. Turn
OFF your device.
4. Reboot
the device into Fastboot
mode. To do that, simply hold down the Volume UP button and connect the other-end of the USB
cable to your device.
5.
Launch a Command Prompt Window
on your Desktop. To do so, hold down the Shift button on your keyboard and right-click on any
empty area on the screen, then select Open command window here.
6. Type
in following command into the Command Prompt Window:
7.
fastboot
flash boot Z_DooMLoRD_CF-Auto-Root-ported_FW-350.img
8.
Next, issue the following command: fastboot
reboot
9. 9.
Your device should boot up and you’ll get a
notification on your screen saying that the device will reboot in 10 seconds.
10. 10.
Once the device reboots, unplug it from your PC.
11. 11.
Now hard power off your device. To do that, hold down the Power button
and the Volume UP
button for about 15 seconds.
12. 12.
Get your device into Fastboot mode by holding down the Volume
UP key and plugging-in the USB cable.
13. 13.
Open a Command Prompt Window on your Desktop. It’s
simple, just hold down the Shift button on your keyboard and right-click on any
empty area on the screen, then choose Open command window here.
14. 14.
Issue the following command using Command Prompt Window:
15.
fastboot flash boot Z_DooMLoRD_insecure_FW-350.img
16. 15.
Once it’s done, issue the following command:
17.
fastboot
reboot
Now you have
successfully rooted your Xperia Z!!!
Disclaimer: Follow the above step to root only Sony Xperia Z. If any damage cause during the rooting process we are not responsible. Also keep in mind rooting will void your device’s warranty.
Tag :
How To
How to Root Samsung Galaxy Y?

Before rooting Samsung Galaxy Y:
· Backup the messages.
· Backup your contacts.
· Videos, images, songs, other files copy to external memory card or to your system.
· Make sure your phone have a 60% charge in your battery.
· Enable USB debugging - Settings > Applications > Development > USB Debugging.
· Take manual note from – setting>wireless & network>mobile network>access point names.
Steps for rooting Samsung Galaxy Y:
· You need drivers for your Galaxy Y to connect with your computer. So, download the drivers.
· Then download the Unlock Root Tool – Here.
· Install the Unlock Root Software.
· Open the Unlock Root Tool. Then connect your Phone via USB cable. Then it will show the Samsung Galaxy Y GT-S5360 in the list.
· Just select your phone.
· Then click Root Button in Unlock Root Rooting Software.
· In few minutes your Galaxy Y get rooted. Then it will ask you to install some other apps. Just click No button to ignore it.
· Then it will ask you to reboot your phone. Just click OK Button to reboot your phone.
· After rebooting check your phone is Super User app is installed or not. If the app is installed, your mobile was rooted successfully.
There are many methods are available to root your Samsung Galaxy Y. But, this method is very easy and can root quickly.
Disclaimer: Follow the above step to root only Samsung Galaxy Y. If any damage cause during the rooting process we are not responsible. Also keep in mind rooting will void your device’s warranty.
Tag :
How To


